
I believe in salad when camping. A camper’s diet should consist of more than charred meat and carbs. I made this salad just after frying some gnocchi on a pan over the campfire.

Quickly fry a handful of raisins, one clove of sliced garlic and a small handful of pine nuts in olive oil. Toss them into the watercress leaves with salt and pepper and a little more olive oil. Walnut oil works well, but it is highly unlikely that I’m going to pack that for a camping trip.
Author: Cath

Eridge Park venison stew
The retort of hunters’ guns sounded throughout our stay at Forgewood campsite on Eridge Park. Wandering through the forest, we startled a small deer. At the sound and sight of us galumphing over splintering wood, the deer fled in one flash of his white tail, back toward the hunters. When we returned to the campsite, we asked if they sold any venison shot on the estate. They did. And so I devised this stew for the campfire.

Serves 4
Ingredients
4 venison steaks, fat trimmed and cubed
1 onion, diced
1 large or 2 small carrots, diced
2 cloves of garlic, peeled
Olive oil
Knob of butter
Couple of tablespoons of plain flour
Salt and black pepper
3 cloves
1 stick cinnamon
3 or 4 cardamon pods
1 bay leaf
Two slivers of orange peel
Method
Marinate the venison in oil, salt, pepper, bay leaf, onion and carrot for about an hour.
I cooked this stew in a large, lidded billy can over a wood fire, but it could be done in any lidded pan on a gas stove. I heated a pan over the fire and put in the marinated meat. Once the meat was browned all over, I added some water, the spices and orange peel, put the lid on and left it cooking for half an hour or so.

Meanwhile I made a thickener with flour and soft butter, mushing it with the back of a fork until completely incorporated. I mixed this thickener with a bit of the liquid from the pan and then stirred it all into the stew. I cooked the stew some more, regularly stirring it and checking it had enough liquid. Once the meat was tender, I crushed the garlic against the side of the pan and stirred it in. Once seasoned the stew was served with fried gnocchi and a watercress, raisin and pine nut salad.
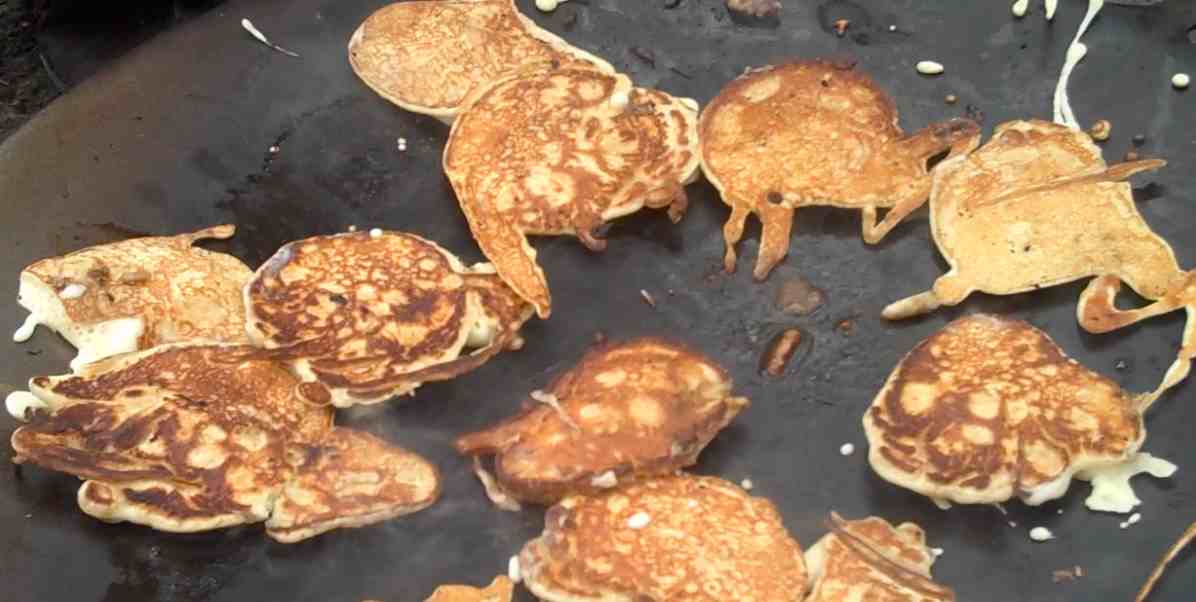
How to cook pancakes on a campfire
I cooked a big batch of small, fat American-style pancakes for breakfast in the woods. I used a muurikka, a large skillet on legs that sits over a hot campfire. The muurikka was new so it required seasoning with a hunk of pork fat. It is a large pan, so I could cook nearly all pancakes and bacon for five people at once: result.
The weighing-out of the “dry” ingredients is best done at home and then, once at camp, you can add the “wet” ingredients. Remember to pack a whisk, a large bowl and something to measure the milk.
Dry ingredients
250g plain flour
1 tsp baking powder
1/2 tsp salt
1 tsp caster sugar
Wet ingredients, to be added before you cook
2 eggs
300ml milk (this generally equates to a large mug-full)
Butter for frying
Method
Put all the dry ingredients into a large mixing bowl and whisk in the eggs. Gradually add the milk, whisking all the time until you have a smooth batter. Batters should always be left to rest awhile, so you have time to set the campfire and heat up the muurikka (or whatever pan you are using). The pancakes should be cooked rather quickly so a small hot fire is ideal.
Once you have a rested batter and a hot pan, melt a knob of butter and add one large spoonful of batter to the pan per pancake. Once the pancakes start to bubble, it is time to flip and cook the other side. For each batch, melt another knob of butter before cooking more pancakes. Serve hot and with any of the following fillings:
Maple syrup and streaky bacon
Fried eggs and bacon
Fresh fruit
Fried bananas
Caramelized apples
Caramelized oranges
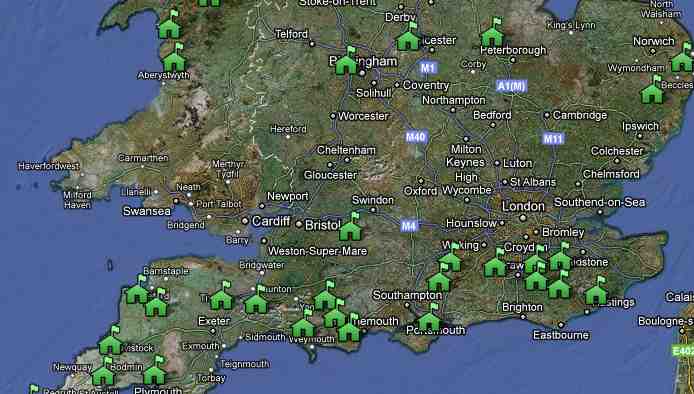
Glamping in the UK map
View Glamping in a larger map
[ad#Google Adsense-solid bar]
Camping gear – Camping cookware
If your campsite allows campfires, then the fire is the heart of your camping cookware. All you need is a grill, propped up with some bricks or hung on a chain from a tripod. A campfire is also a ravenous bin, burning up food waste and cardboard packaging.

If you are camping at a festival, don’t bother with cooking your own food. There is nowhere to wash up and you will miss all the fun while you are frying bacon.
I always prepare two “just pitched” meals and some breakfast rolls: after pitching the tent, sorting out the bedrooms and lighting the fire, I don’t want to do a big shop or cook, I want to crack open a beer, warm something on a campfire and watch the children leap about.
Grill
We have ditched the barbecue but kept the grill, propping it up with bricks or stones, and using it to cook over the campfire.
Trangia
The methylated spirit stove (Trangia) packs down small and comes with saucepans, a frying pan and a tiny kettle. But it can only cook one thing at a time. A two ring propane stove lets you extend your culinary options, but will take up more space.
Crockery and cutlery
Because you can’t always use your fingers. And pack a wooden spoon or two for stirring, a nylon sieve, and a fish slice. And tongs, for turning hot meat.
Kettle
A whistling kettle with a handle that folds flat.
Corkscrew and can opener
Not just the old rusty ones in the kitchen drawer but ones that actually work.
Skewers
Wooden or metal ones for kebabs.
Meat thermometer
If I’m cooking a joint of meat or a bird over a campfire, I like it perfectly done, and because you are not using a domestic oven, with its reliable temperature, a thermometer spares the campfire cook all that uncertain prodding and poking.

Paring knife
Look for a very sharp paring knife with a protective cover. A bread knife, wrapped in a tea towel to protect the serrated blade, is also required; if someone could invent a camping bread knife with a cover, I’d be very grateful.
Plates, bowls, melamine mugs and a chopping board
We experimented with folding plastic mugs and plates, which I was adept at assembling but which completely defeated Math. I replaced them with melamine equivalents that should last us until the end of time.
Potato peeler and vegetable brush
For scrubbing and peeling spuds. I have an abrasive glove that I use to clean my spuds.
Opinel knife
A sharp knife is always useful. A sharp knife that folds back into its handle is essential. Hence the design classic that is the French Opinel knife. Used for cutting vegetables, whittling kindling, removing things from bike chains, opening packets etc
Serving and mixing bowl
You can eat salad while camping, it is allowed.
Lock-and-lock containers
Any sealable plastic containers are useful for storing leftovers.
Tin foil
To cook a large joint of meat on the campfire, you will have to wrap it in tinfoil once it has been browned.
Camping Gear – Food and drink
Prepare at least one meal for when you arrive, something you can easily heat up once you’ve pitched the tent. You can try some of my recipes for Just Pitched Dinners.

Basic cooking ingredients
Olive oil, salt and pepper, butter and some tinned food. Amounts really depend on what you have to store it all in. Tea bags, coffee, sugar, of course.
Carbs and protein
I pack plenty of pasta, rice, couscous and even my campfire bread mix. Then some easy-to-store proteins like beans, chickpeas, halloumi cheese, tinned tuna, houmous, saucisson and anchovies.
Sauces etc.
My camp kitchen also includes tinned tomatoes and coconut milk, onions, carrots, garlic, chillies and fresh tomatoes. Prepared spices, flavourings and dressings such as salsa romesco, mustard, french dressing, garlic and ginger paste, garam masala and chermoula. I also stuff fresh herbs into one of my lock-and-lock containers.
Snacks
Something that is calorific and won’t melt in the sun.
Collapsible washing bowl
In which you can wash the dishes and the baby.
Booze
Ice is hard to come by at campsites, so you want a tipple that doesn’t require it, such as whisky or red wine. My friend swears by mead. Remember the trip to the toilet is further than the short hop across the landing, so don’t go overboard. The warming effect of alcohol quickly wears off, and leaves you colder afterwards.
Hot chocolate
The effort involved in making hot chocolate at night ensures it will be the finest experience you and chocolate will ever share. Don’t skimp on the cocoa and melt real chocolate drops in the milk for added pleasure.
Cool bag or box
Boxes take up space, but keep food safe from wildlife and leaks. Many sites let you chill ice blocks in their freezers, sometimes for free, sometimes for a price.
Frozen milk
Put milk cartons in the freezer for a few days before you go. Pop them in your cool bag and not only will they chill the rest of the bag’s contents, they will also thaw in time for you to drink.
Water carrier
A collapsible one with a tap. You want water to hand for drinking, cooking and light washing.
Water flasks
Bottled water is over. Refillable flasks are where it’s at, and you’ll need them as being outdoors all the time will make you much thirstier than usual. Make sure the kids have their own flasks.
Camping Gear – Hygiene
Just because you are sleeping under the stars, there is no need to let some basic standards of cleanliness slip.

Toiletries
Unless space is no problem, stick to the bare minimum. I have, in the past, taken a special wash that is suitable for clothes, dishes, skin and hair. Makes you wonder if this whole washing-up liquid, body gel, shampoo divide is entirely arbitrary. Our friend Tintin travels with nothing more than a toothbrush. You can buy camping towels that take up far less space than the bulky ones in your bathroom. They come in pink or blue. Some anti-bacterial hand gel is particularly useful at festivals. Some of you will want contraceptives, others will be packing nappies (for small children, I pack six nappies a day for each child).
Toilet paper
Three rolls.
Bin bags
For rubbish and for quarantining wet or dirty clothes in.
Toothbrush and toothpaste
Arguably, the most essential piece of camping gear. Even more than the tent. You can always borrow a tent.
First Aid kit
For bumps and scrapes. You want plasters, bandages and something to disinfect wounds. It’s also worth investing in a burns kit, which we’ve required on a number of occasions, not least the time a hot marshmallow stuck to the side of a child’s face. Also, a few precautionary sachets of paracetamol and ibuprofen in solution for children and adults.
Insect repellent
Citronella candles are particularly evil. There is something satisfying about the sizzle of a fat moth in a naked flame. Take something to repel the insects, and a cream or antihistamine to treat the bites or stings. An antihistamine is a miracle cure when the toddler goes face-first into a verge of nettles.
Washing line
For drying washing, rain-soaked clothes and tea towels. Don’t forget to take some pegs as it is quite hard tying undies to a line.
Solar powered shower
Sounds fancier that it is. Basically this is a black bag you fill with cold water and once the sun has warmed it up, you take it into the woods, strip off, hang it from a tree and let gravity do the rest. It’s not a power shower but is good enough to refresh you mid-festival. Festival showers struggle with water pressure and what may seem like an uninhibited playful exercise in communal cleansing quickly turns into three cold naked people huddled under a dripping tap.
Sun hats and sun cream
Because it is always a scorcher when you are camping.
Washing up kit
So that’s tea towels, washing up liquid, a washing up brush, some kitchen roll and even a surface cleaner, as you attempt to maintain a basic level of hygiene.
Camping gear – Sleeping bags and camping lanterns
How to get through the night while camping. It will also be colder than you expect.

Thermal underwear
Wear long-legged and long-armed thermals under your jeans and jumper for sitting out in the evening, and under your pyjamas when you go to bed.
Bed and bedding
The minimum is a decent sleeping bag and self-inflating mattress per person. You can use a thick jumper as a pillow. For family campers, the only chance you have of a decent nights’ sleep is if the kids are warm and comfortable, so an extra blanket and a snuggly toy are essential for them. Augment the powers of an ordinary sleeping bag with a silk liner. When packed, a silk lining takes up about the same amount of space as a pack of cards and the warmth they retain is really worth it. Also if gets really cold you can pull the silk lining over your face and breathe through it. Silk liners are easier to wash, too, as the insulating properties of a sleeping bag are diminished by each pass through the washing machine.
If we camp out of season, in early March or October, then I pack the various sheepskin rugs around the house and put them on top of the mattresses to provide an extra level of insulation. Inflating an air mattress is a tedious job, and I think children can make do with thin self-inflating mattress or a bed roll. Out of season, a big air bed fills up with cold air that leaches heat out of your body, and I am on the verge of abandoning it altogether and returning to the thin, self-inflating Thermarest.
Torch
A torch is necessary for adults, but a torch for each of the kids adds to the sense of night time adventure. We used to keep a small lantern on at night but it quickly burnt through batteries. Instead, pack a handful of fluorescent snappy lights to allay any night-time fears, and a small cheap battery-powered lantern. Math has a hefty Maglite torch, a hangover from his days as a security guard on Liverpool docks, and I have a pencil-thin one that fits in my purse. Avoid the large lanterns, some of which burn so brightly as to extinguish all atmosphere. Candles in fireproof paper lanterns, weighed down with pebbles, make a pleasant alternative when you sit outside chatting of an evening. Naked flames and tents do not mix. The one time I saw a tent engulfed by flame, the whole structure went up in a single ‘poof’.
Continue reading Camping gear – Sleeping bags and camping lanterns
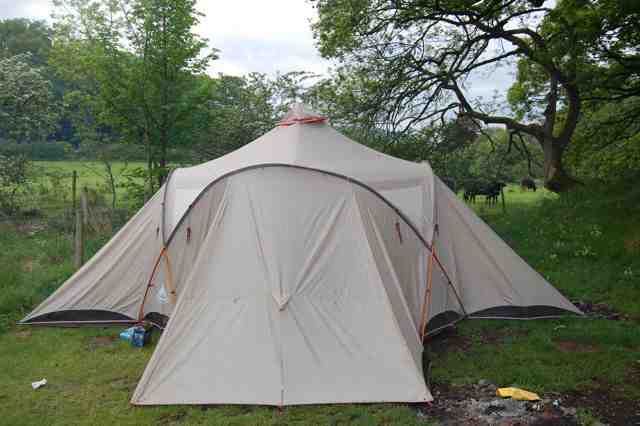
Camping Gear – Tent and the basics
Camping shops sell a wide range of camping gear and camping accessories, only a few of which are essential. If you pack camping carpet you need to ask yourself if you have the right hobby. We pack as light as possible because it makes pitching and striking from campgrounds easier and quicker: maximum utility, minimum weight.

Tent
Before rushing out to buy the biggest tent in the shop, bear in mind that some of the more interesting campsites are quite small and will refuse entry or charge more for an enormo-tent. At festivals, a big tent can be a massive problem, as it will be far too heavy to lug from the car park and you won’t necessarily have a large enough pitch for it. Nearly all the family tents on sale play to the delusion that you are buying a house, in which square footage is important and weight irrelevant. You are not buying a house. You are camping because you want to be outdoors, not because you want to cover the outdoors in a giant bag. A well-designed family tent should have headroom in the living area, but low ceilings in the bedrooms to trap heat.
Tarp
A sheet of tarpaulin strung from a tree means you can cook in drizzly weather, and offers breezy shade when the sun is out.
Waterproofs
All-in-one suits and wellies for toddlers, all-in-one suits for babies, and waterproof jackets for everyone else. If you don’t want to wear waterproof trousers, then change into shorts. Walking boots or wellies are essential, especially at festivals, where the mud can be biblical.
Picnic rug
If you don’t want to bother with a table and chairs, take a plastic-backed picnic rug.
Table and chairs
We used to camp without a table and chairs, using a rug instead. After five years of eating off the ground, Math’s longing for a chair was so intense I was concerned that he would resort to theft. I found flat pieces of reinforced plastic that slid unobtrusively into my rucksack and could be folded into small stools, about six inches high, but the spectacle of him squatting on them only added to Math’s indignity and sense of failure as a man. Once we switched to camping with a car, he bought himself the biggest chair in the shop.
Cooking Matches
Long matches to light fires, stoves and barbecues. A cigarette lighter is not always suitable.
Ordnance Survey map of the area
Math is a great believer in the importance of orientating ourselves upon this earth.
Clothes
Don’t forget to take a big warm jumper; whatever the season, it gets cold at night. At bedtime, stuff the jumper into a pillowcase and rest your head upon it.
Continue reading Camping Gear – Tent and the basics
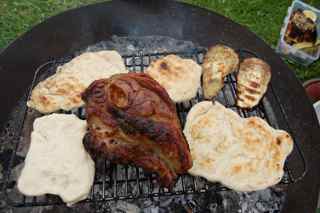
Cath’s campfire roast dinner: Lamb shoulder with aubergine and flat bread
On a windy field in the Cotswolds, I roasted some lamb shoulder over a low campfire. The field was around the back of Abbey Home Farm with a view of the surrounding land, upon which the lamb in question had been organically reared.

I have cooked lamb shoulder steaks on an open fire before. They are an ideal cut for the campfire, with a goodly amount of fat, so they are less liable to dry out. I reckoned a larger joint might work.
Math set the fire and balanced a grill, keeping the meat well out of the flames, but close enough so that it would cook. I rubbed the joint with salt, pepper and olive oil and placed it on the grill. After turning it a couple of times, it was browned and sealed. To speed up the cooking and keep moisture in, I then wrapped it in tin foil. I can’t give cooking times, because it depends on the ferocity of the fire. A joint like this, with a substantial bone in it and side of fat, doesn’t require exact timings.

Once it was nearly cooked, I removed the joint from the foil and exposed it to the fire again, to crisp up the outside. I am considering taking a meat thermometer on my next camping trip, Math thinks this is a utensil too far, but for cooking larger joints of meat on the fire I’m going to put it down as a necessity. I am quite good at telling when meat is cooked by pressing it and judging how bouncy it is, but the bigger the joint, the harder that is to do.
Once the lamb was ready, I set it aside to rest for fifteen minutes. Then I flapped some thin slices of aubergine down on the grill. Lightly charred aubergine has a smoky flavour that fits campfire cooking. For substance, I nudged some homemade flat bread dough onto the grill, the plan being to serve the lamb with the aubergine wrapped in garlicky, soft, warm bread. Here’s my recipe for making flat breads on a campfire.
Cath’s campfire flat breads
This takes a bit of prep at home, where I weigh out the dry ingredients and store them in a sealed plastic bag. I also take a little extra flour in case my dough turns out a little too wet.
Dry ingredients:
500g strong white bread flour
1 1/2 tsp dried yeast
1 1/2 tsp salt
What to add at camp:
300ml warm water
1 clove garlic, finely sliced
4 or so tablespoons of olive oil
Make the dough as soon as the fire is lit. You want it to rise before you cook it. In a mixing bowl, put the dry ingredients and mix the water in with your hand. You can knead the dough in the bowl. Do this for at least five minutes, ten if you can. You want a smooth dough, not too wet or dry. Add some more flour or water to achieve this. Leave it in the bowl covered with a damp tea towel by the side of the fire, so that the dough rises.
Leave it for at least forty minutes, longer if you can. Finely slice the garlic clove and mix it into the olive oil. Once you are ready to cook the breads, shape them by pulling off tangerine-sized lumps of dough, roll it into a ball in your hand and then flatten it as thin as you can, dip it into the garlic flavoured oil and throw it on the grill. Once the underside is browning and bubbling up a little, flip the bread over to cook the other side. Serve immediately.
Sliced aubergine grilled over the campfire
2 aubergines
Olive oil
1 clove garlic
Salt and black pepper
This is so simple. Aubergines thrive when cooked over a fire, getting just the right smoky crisp texture. Simply slice the aubergine 1/2 cm thick, brush with quite a lot of oil, but not so it is dripping. Cook over your fire until it is charring, flipping once. Crush a clove of garlic and put in a serving bowl with salt and pepper. When each slice is done on both sides, put it in your serving bowl with the salt, pepper and crushed garlic. Mix thoroughly, you can eat hot, warm or cold.
Abbey Home Farm
View Campsites, campfires, UK in a larger map